***How-To*** Install Valve Springs & Valve Stem Seals
I stole this from Honda-tech.com, original link is Honda-Tech.com: ***How-To*** Install Valve Springs & Valve Stem Seals
I thought this would be good info for this forum, hope this helps someone..
I thought this would be good info for this forum, hope this helps someone..
Originally Posted by wildoutwhitegsr
Tools Required:
-3/8 Ratchet
-1/2 Ratchet
-10mm socket
-12mm deep socket
-14mm socket
-19mm socket
-5/8 spark plug socket
-6” Extension
-Breaker Bar
-Socket handle to go into the 12mm socket
-Pliers or valve seal removing tool
-Valve spring compressor
-Hose from a leakdown tester
-Compressor
-Rubber mallet
-Telescopic magnet, if you drop the valve keepers
-Cam gear holder or 5mm punch (2) or 5mm allen key (2)
-Engine oil or assembly lube
We got to organize everything that’s going back into the head and identify what they are:
-valves
-valve spring seats
-valve stem seal
-intake valve spring(s)
-exhaust valve spring(s)
-retainer
-valve keepers
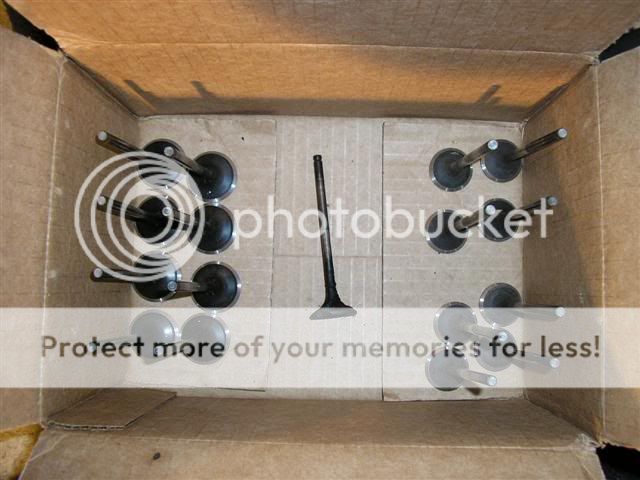
Valves (ignore my burnt exhaust valve in the middle)
Valve springs, retainers, valve seats
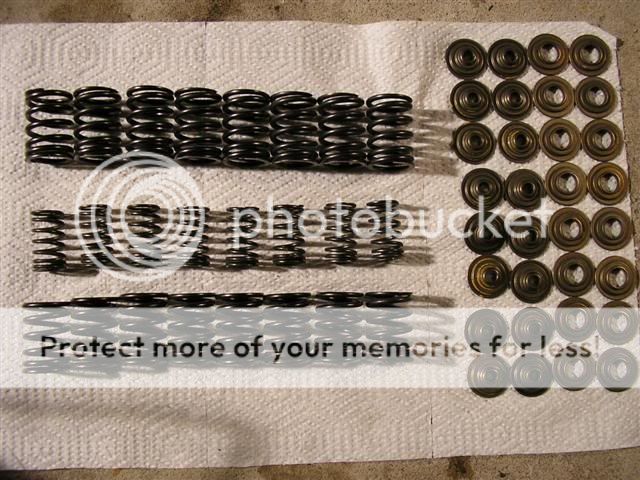
Top valve spring is the GSR outer intake, the middle is the GSR inner intake and the bottom is the GSR exhaust. The retainer is the 2 columns to the left with the small diameter hole used to hold the valve keepers. *Note* that in the picture the retainers are upside down. The valve seat is the two farthest columns to the right with the bigger diameter hole that goes over the valve guide in the head.
1) First things first, find a place to work on your car.
2) Then pop your hood and remove your spark plug cover(if applicable), spark plug wires and valve cover using the 10mm socket and ratchet.
B18A/B Valve Cover
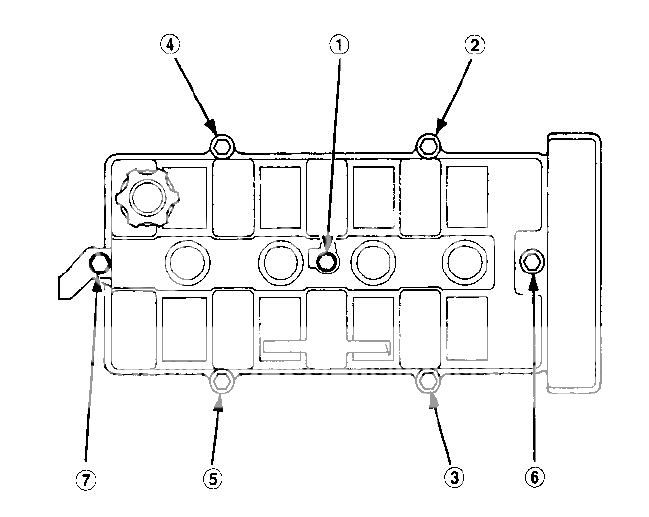
B18C1/5 Valve Cover

Valve cover removed
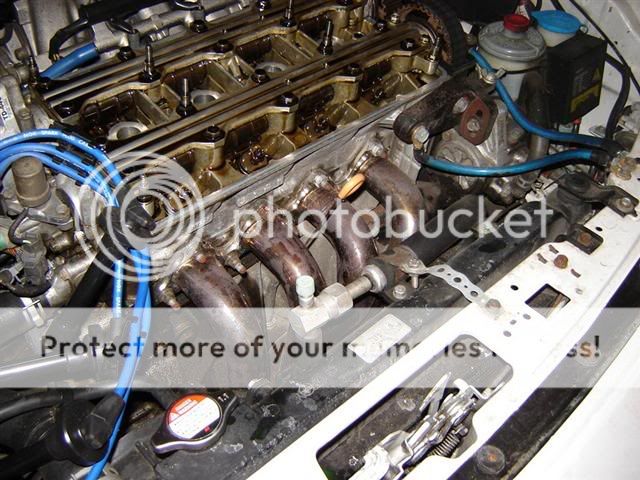
3) Then locate the under hood fuse box and take the cover off. **Optional Step**
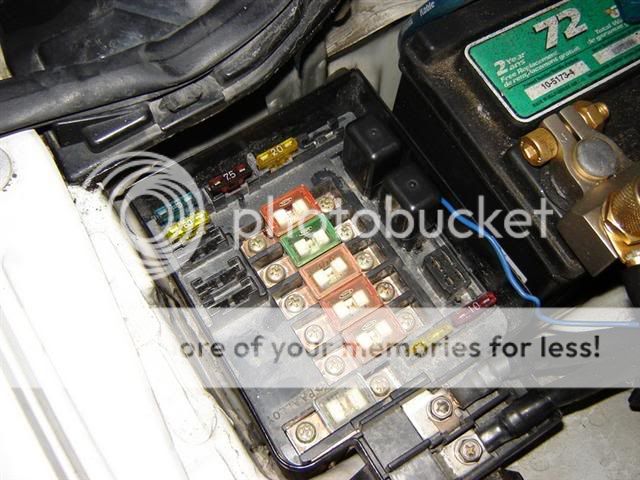
4) Then locate the 15amp fuse and remove it. This prevents fuel from being squirted into the engine when manually cranking it over to TDC for each cylinder. **Optional Step**
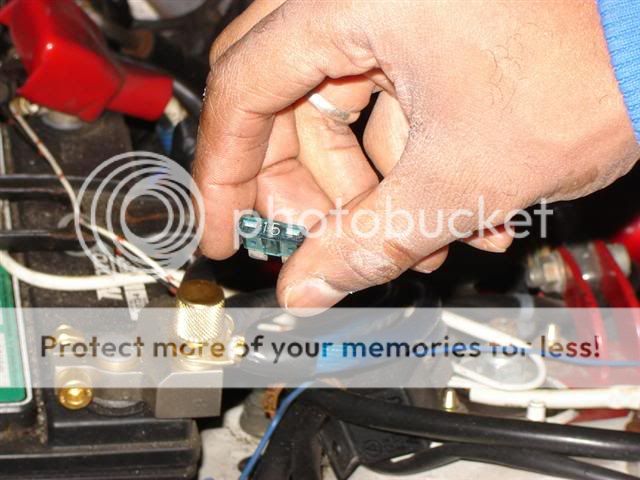
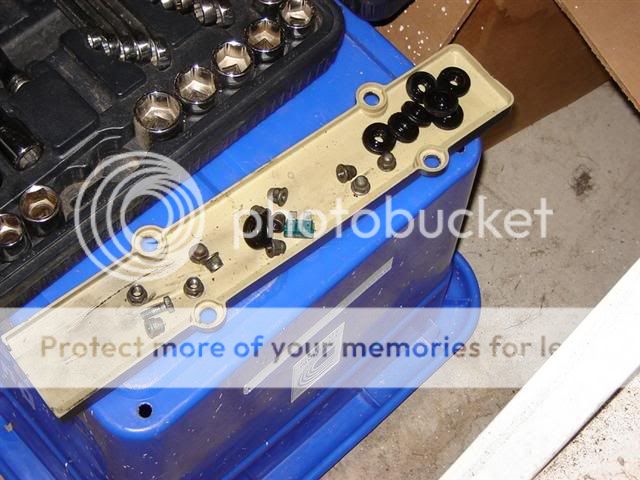
5) Place all the bolts and valve cover grommets in a safe place. For me it's in the spark plug cover.
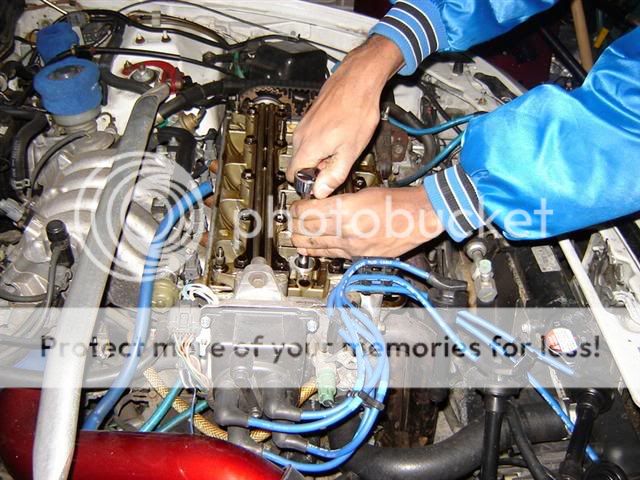
6) Now start to remove each spark plug using the 5/8” spark plug socket extension and ratchet, like so. I started at cylinder 4

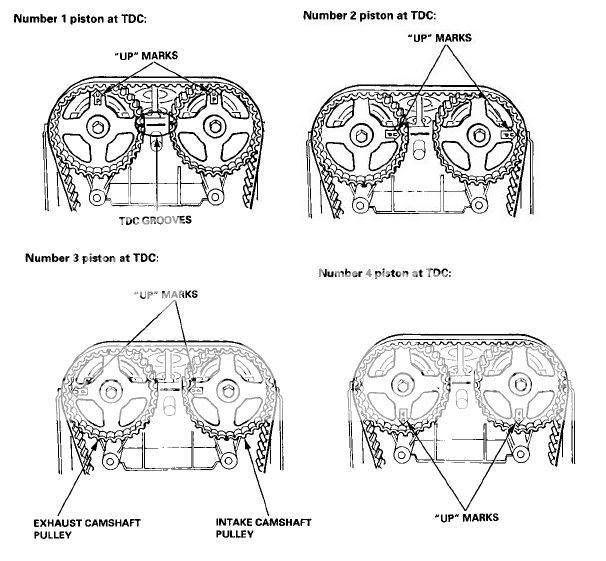
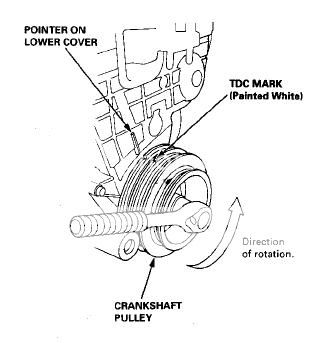
7) Now that the spark plugs are removed, grab your 19mm socket and proceed to turn the crank to TDC for cylinder 1
The crank pulley bolt is located here
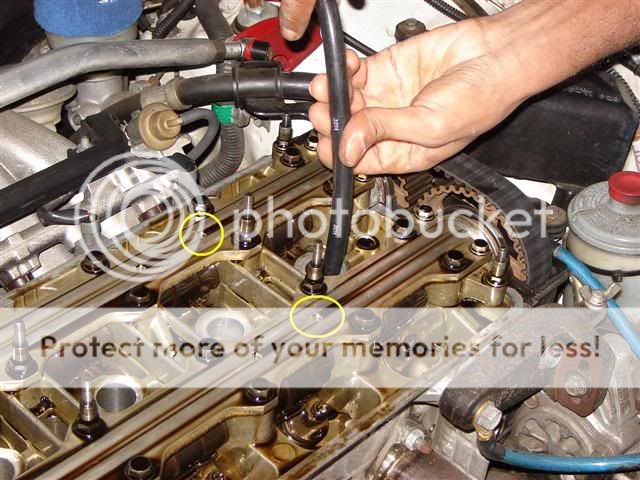
 Loosen NOT remove both cam gear bolts with your 14mm and breaker bar. Do Not use an impact on these bolts. To make it easy use the two 5mm punches through the cam plate holder and cam holder into the camshaft. Circled here in yellow.
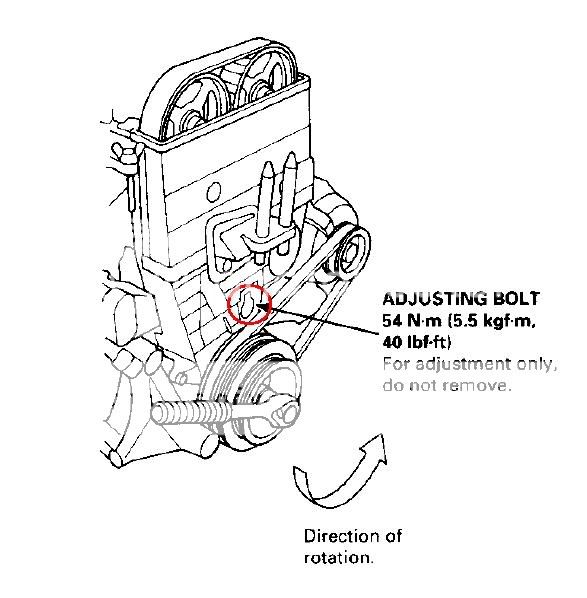
9) Loosen the timing belt tensioner bolt by removing the plug circled in red to expose the tensioner bolt.
10) Remove the cam gear bolts along with the cam gears and key. Make sure to be careful when removing the cam gear & key to not drop or loose it.
11) Remove both cam holder plates by loosening the 10mm bolts on the outside are first. Then the 12mm bolt starting from the outside bolts and working your way in. *The numbers on the picture below are for tightening*
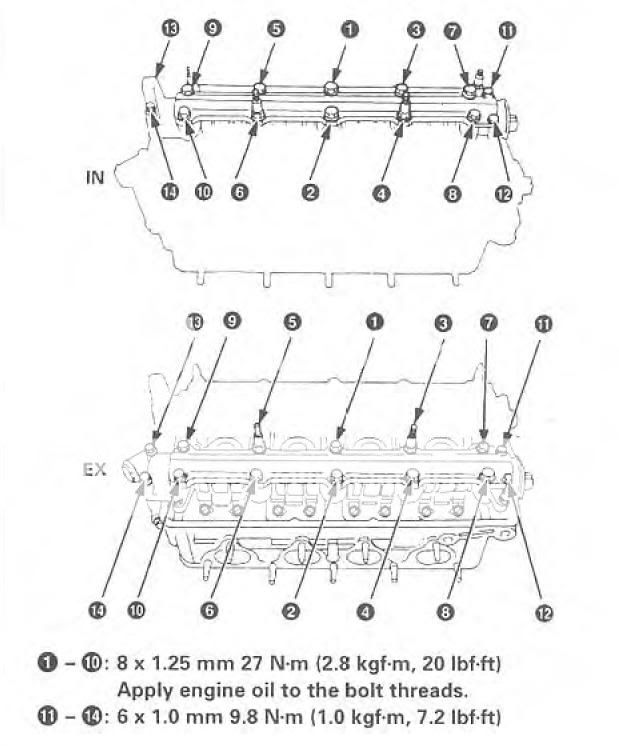
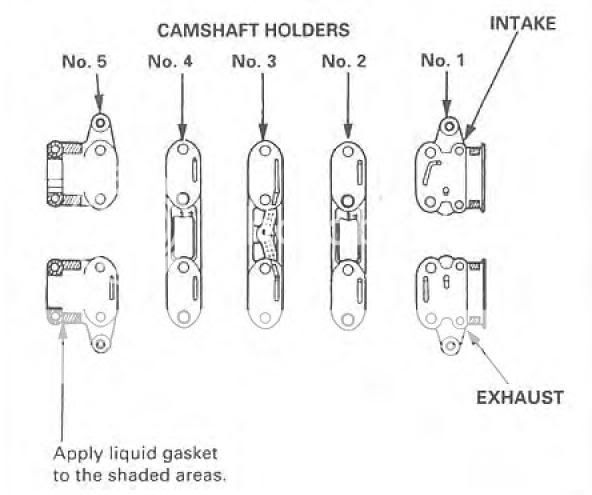
12) Remove the cam holders, taking care to remember how and where you removed them from
B18A/B
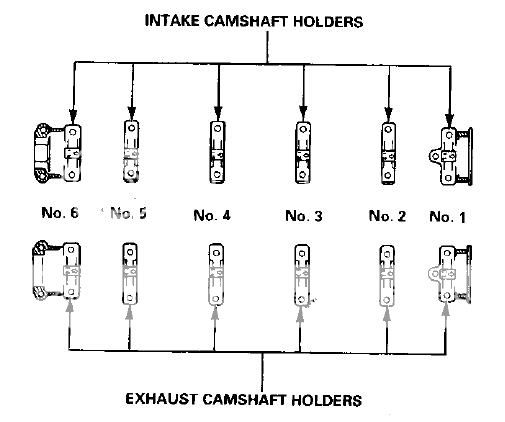
B18C1/5
13) Remove your camshafts and place them on a cloth in a safe place, along with the cam gears, key and cam gear bolt.
14) Grab your leakdown tester hose and screw the threaded end into the spark plug hole for cylinder 1. Plug the other end into your compressor. Make sure that the compressor is plugged in and turned on.
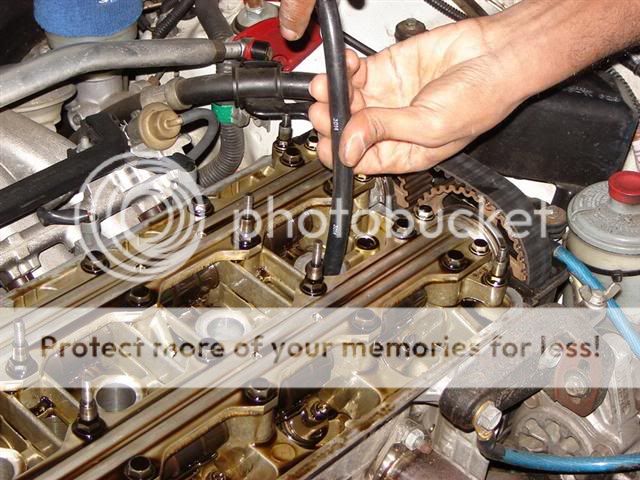
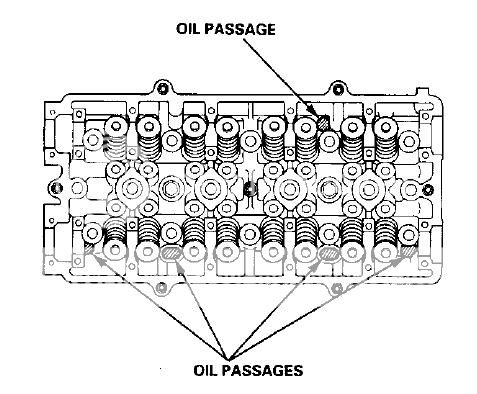
15) Very Important Step plug all the oil passages with paper towels. The oil passages are located here
16) Grab your 12mm deep socket and extension then place it over the retainer
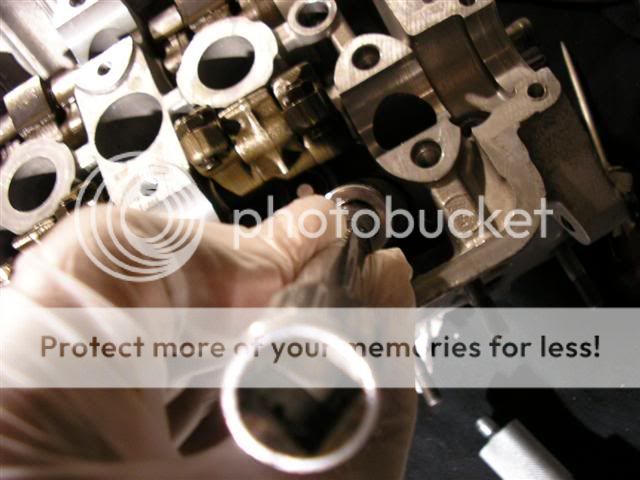
17) Give it a good wack with your rubber mallet to loosen the valve keepers from the retainer. Try not to loose the valve keepers
What the valve keepers installed looked like

Valve keeper removed (how it should look after hitting it with the 12mm socket and rubber mallet)
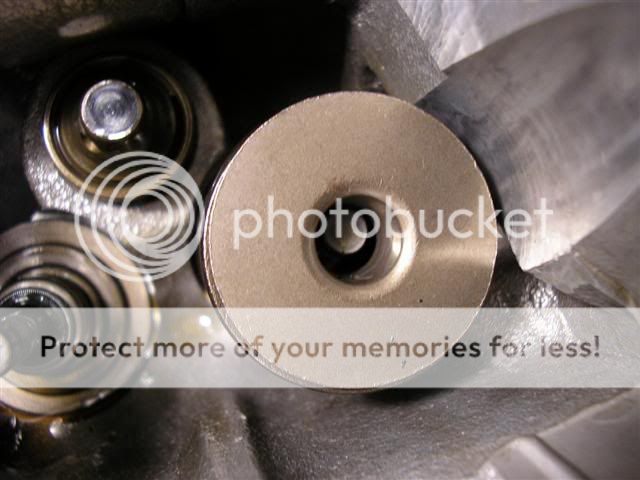
1 Remove the retainer from the top of the valve spring(s)
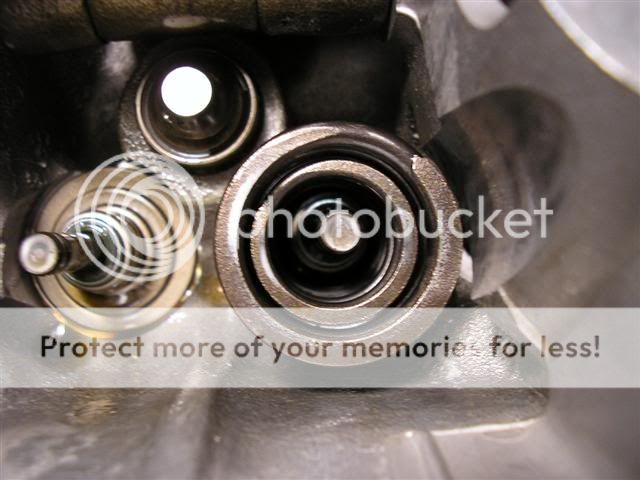
19) Remove the valve spring(s) to expose the valve seat and valve stem seal
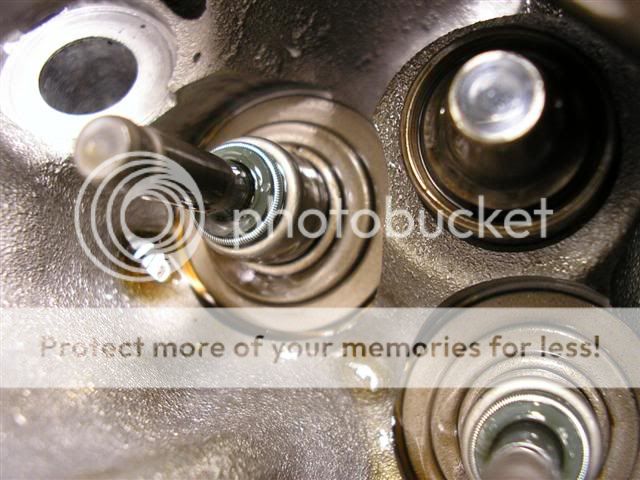
20) Grab your pliers or valve stem seal removal tool and remove the old valve stem seal. Left side has no valve stem seal, the right side does.
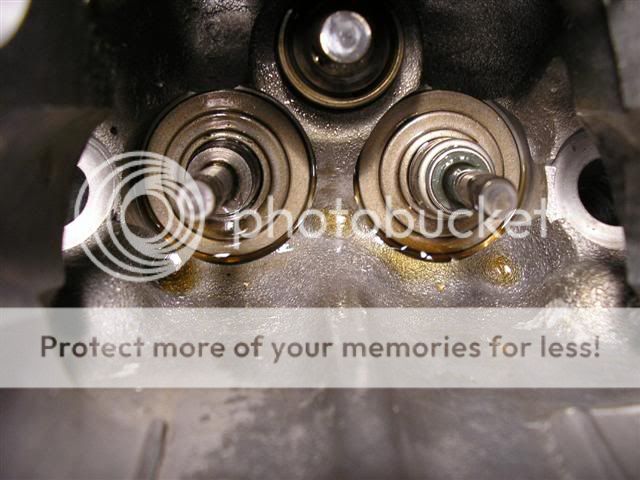
With all valves, valve springs, valve stem seals, retainers and keepers removed. *Note* head is off the car. If your doing this with the head on the car, do it one at a time.
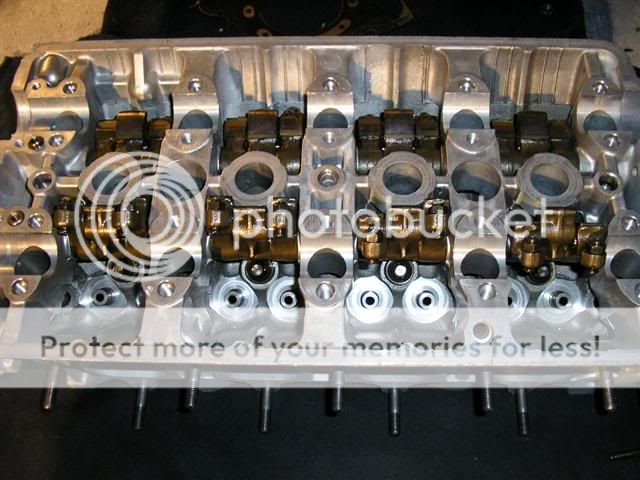
21) Install the valve seat buy just placing it over the valve guide. <FONT COLOR=""Red"">Those that are doing this while the head is still in the car skip this step.</FONT>
How it looks with no valve seat
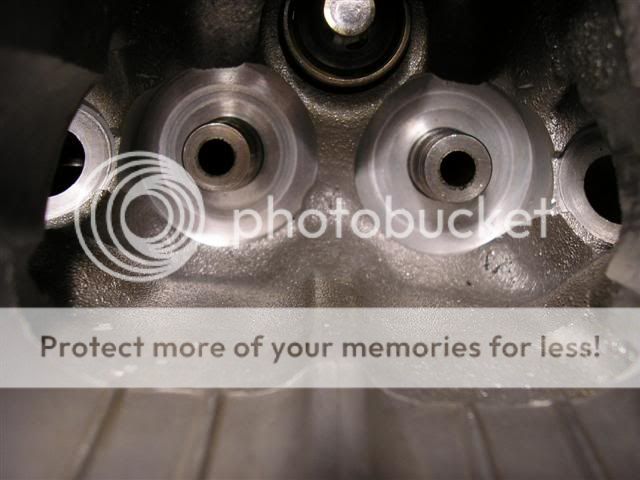
How it looks with the valve seat installed (left side)

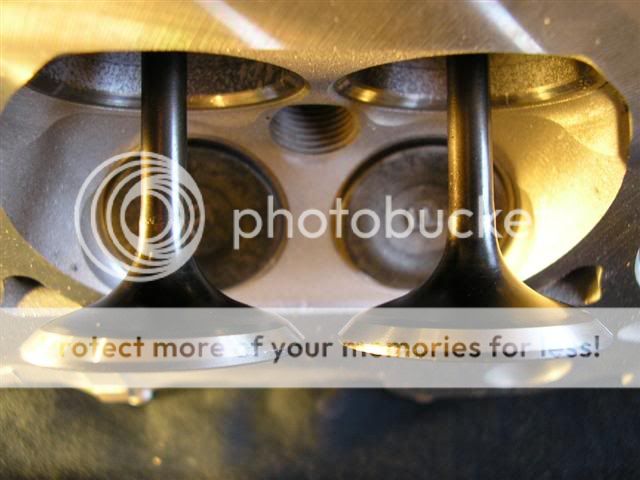
22) Now lube the valve stem with oil or assembly lube and place it into the valve guide. <FONT COLOR=""Red"">Those that are doing this while the head is still in the car skip this step.</FONT>
-3/8 Ratchet
-1/2 Ratchet
-10mm socket
-12mm deep socket
-14mm socket
-19mm socket
-5/8 spark plug socket
-6” Extension
-Breaker Bar
-Socket handle to go into the 12mm socket
-Pliers or valve seal removing tool
-Valve spring compressor
-Hose from a leakdown tester
-Compressor
-Rubber mallet
-Telescopic magnet, if you drop the valve keepers
-Cam gear holder or 5mm punch (2) or 5mm allen key (2)
-Engine oil or assembly lube
We got to organize everything that’s going back into the head and identify what they are:
-valves
-valve spring seats
-valve stem seal
-intake valve spring(s)
-exhaust valve spring(s)
-retainer
-valve keepers
Valves (ignore my burnt exhaust valve in the middle)

Valve springs, retainers, valve seats

Top valve spring is the GSR outer intake, the middle is the GSR inner intake and the bottom is the GSR exhaust. The retainer is the 2 columns to the left with the small diameter hole used to hold the valve keepers. *Note* that in the picture the retainers are upside down. The valve seat is the two farthest columns to the right with the bigger diameter hole that goes over the valve guide in the head.
1) First things first, find a place to work on your car.
2) Then pop your hood and remove your spark plug cover(if applicable), spark plug wires and valve cover using the 10mm socket and ratchet.
B18A/B Valve Cover

B18C1/5 Valve Cover

Valve cover removed

3) Then locate the under hood fuse box and take the cover off. **Optional Step**

4) Then locate the 15amp fuse and remove it. This prevents fuel from being squirted into the engine when manually cranking it over to TDC for each cylinder. **Optional Step**

5) Place all the bolts and valve cover grommets in a safe place. For me it's in the spark plug cover.

6) Now start to remove each spark plug using the 5/8” spark plug socket extension and ratchet, like so. I started at cylinder 4


7) Now that the spark plugs are removed, grab your 19mm socket and proceed to turn the crank to TDC for cylinder 1

The crank pulley bolt is located here


9) Loosen the timing belt tensioner bolt by removing the plug circled in red to expose the tensioner bolt.

10) Remove the cam gear bolts along with the cam gears and key. Make sure to be careful when removing the cam gear & key to not drop or loose it.
11) Remove both cam holder plates by loosening the 10mm bolts on the outside are first. Then the 12mm bolt starting from the outside bolts and working your way in. *The numbers on the picture below are for tightening*

12) Remove the cam holders, taking care to remember how and where you removed them from
B18A/B

B18C1/5

13) Remove your camshafts and place them on a cloth in a safe place, along with the cam gears, key and cam gear bolt.
14) Grab your leakdown tester hose and screw the threaded end into the spark plug hole for cylinder 1. Plug the other end into your compressor. Make sure that the compressor is plugged in and turned on.


15) Very Important Step plug all the oil passages with paper towels. The oil passages are located here

16) Grab your 12mm deep socket and extension then place it over the retainer

17) Give it a good wack with your rubber mallet to loosen the valve keepers from the retainer. Try not to loose the valve keepers
What the valve keepers installed looked like

Valve keeper removed (how it should look after hitting it with the 12mm socket and rubber mallet)

1

19) Remove the valve spring(s) to expose the valve seat and valve stem seal

20) Grab your pliers or valve stem seal removal tool and remove the old valve stem seal. Left side has no valve stem seal, the right side does.

With all valves, valve springs, valve stem seals, retainers and keepers removed. *Note* head is off the car. If your doing this with the head on the car, do it one at a time.

21) Install the valve seat buy just placing it over the valve guide. <FONT COLOR=""Red"">Those that are doing this while the head is still in the car skip this step.</FONT>
How it looks with no valve seat

How it looks with the valve seat installed (left side)

22) Now lube the valve stem with oil or assembly lube and place it into the valve guide. <FONT COLOR=""Red"">Those that are doing this while the head is still in the car skip this step.</FONT>

__________________
My Old Honda
My Old Honda
Last edited by BigBodySmith; 09-30-2006 at 09:55 AM.
Nice find man! Great info
__________________
R.I.P. Kevin Gonzales Aka Slo_Si
You will be missed by many.
R.I.P. Robert Kolp Aka 00ek
You will be missed brother
R.I.P Jake D Aka Cold_Beer
you will be missed brother
R.I.P. Kevin Gonzales Aka Slo_Si
You will be missed by many.
R.I.P. Robert Kolp Aka 00ek
You will be missed brother
R.I.P Jake D Aka Cold_Beer
you will be missed brother
omg i hated those dayum keepers  telescopic magnet FTW!
 telescopic magnet FTW!
__________________
by http://www.flickr.com/people/8341770@N07/, on Flickr
if you can only race me in a straight line then whats the point  ...91 SMF SCCA
 ...91 SMF SCCA
I see people out there spending money on the car to improve it … If you spend half that effort just working on your driving skills, making you and the car work together as a team, then you’ll go faster – period. To make the car go a second faster on the track takes a lot more energy and money than making yourself drive it one second faster.
– the late Tom Thrash SCCA Solo E Production


