SR20VET build up...
Thanks for the kind words... I'm going to leave it as is for the time being, but if it becomes a problem I will definitely switch it out. I've got bigger fish to fry ATM...
Last edited by Jr_SS; 01-15-2012 at 08:49 AM.
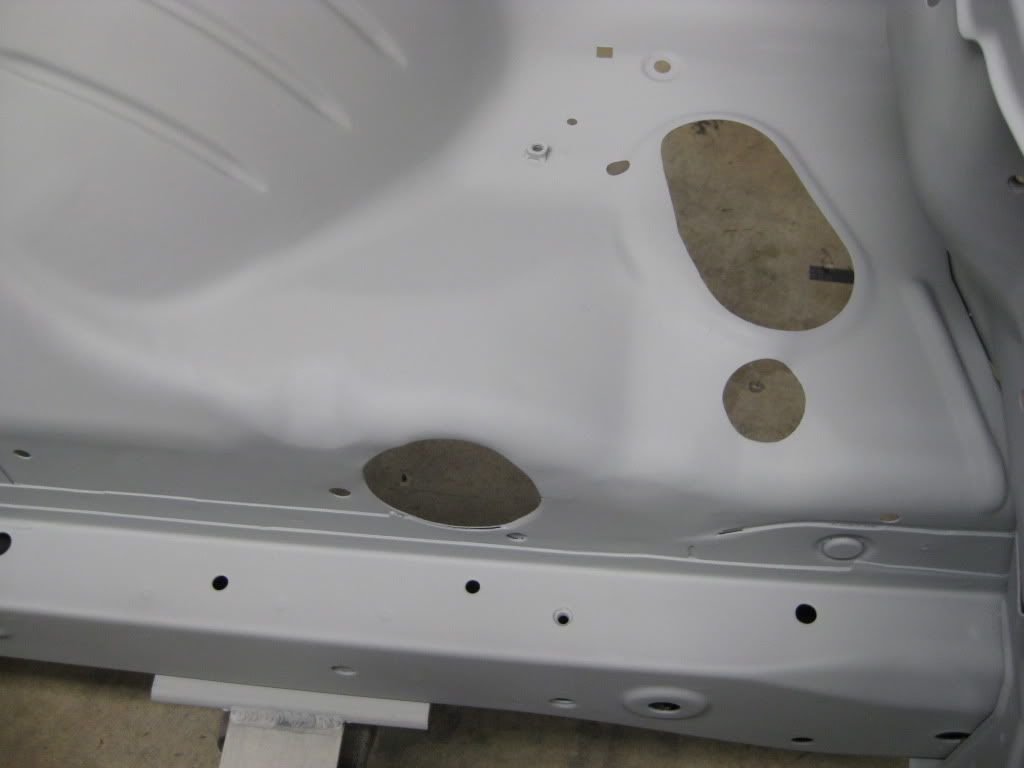
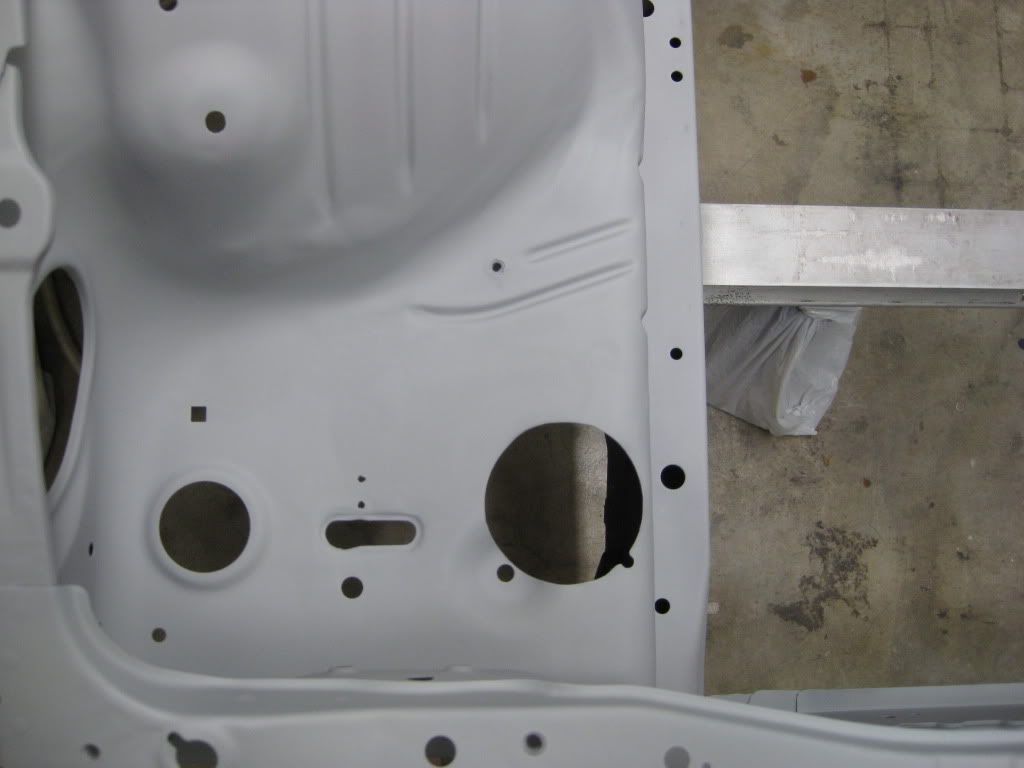
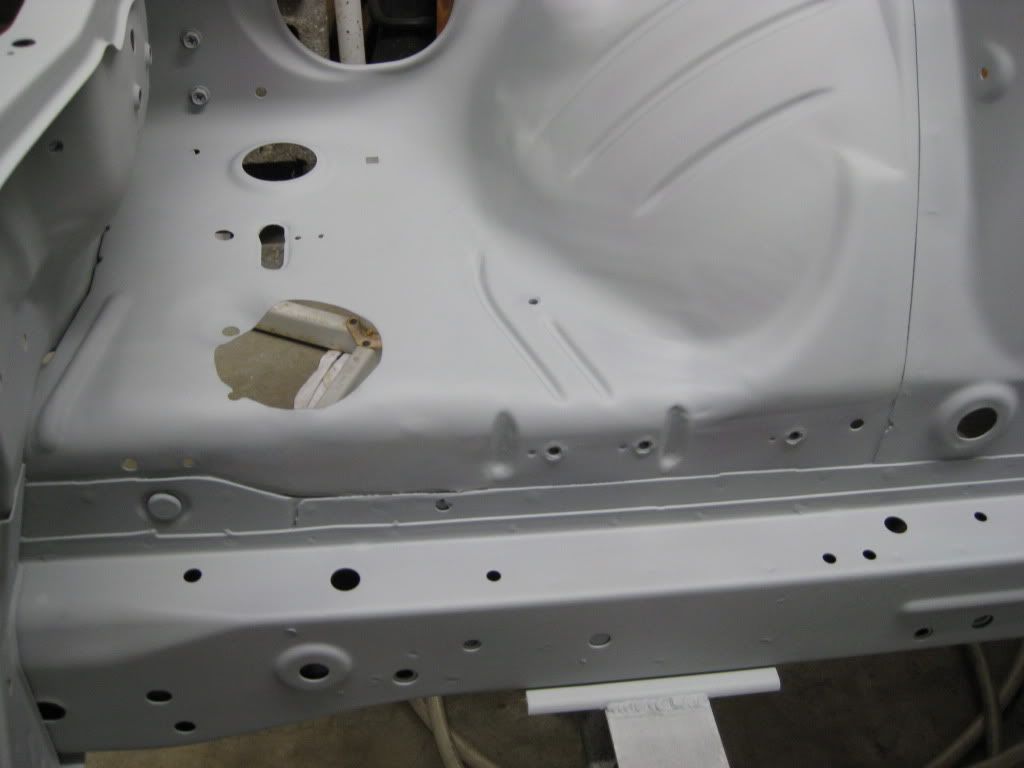
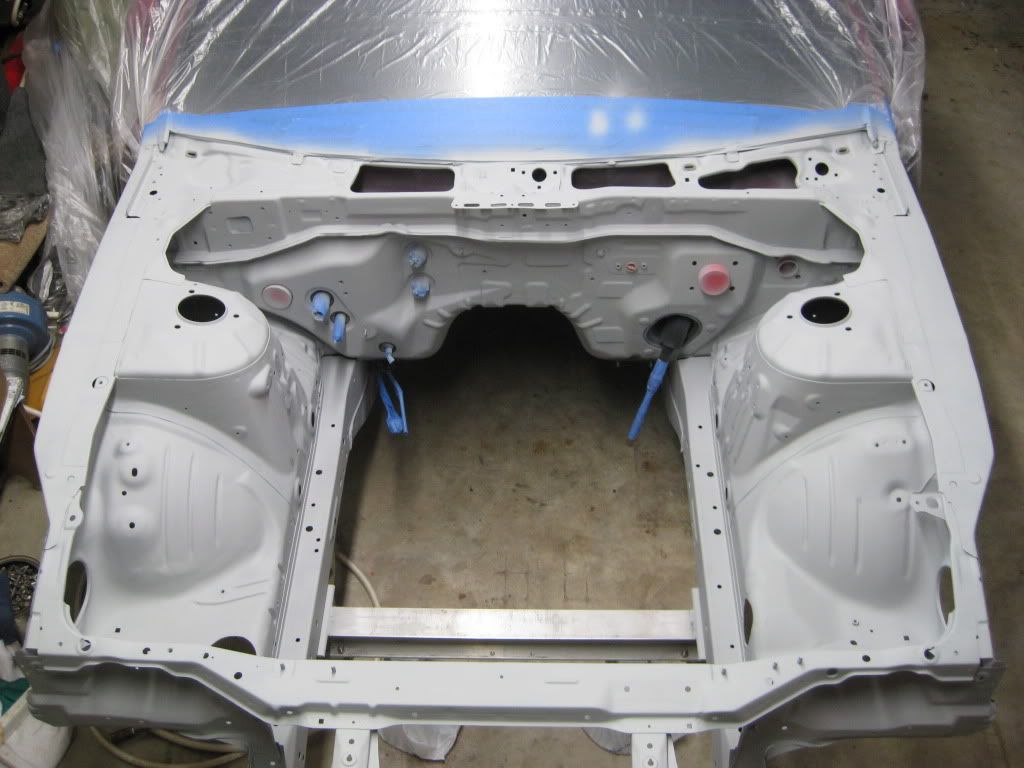
So this past weekend I got the bay all wiped down and shot with primer. I wiped the bay down a total of 3 times, making sure I didn't miss any areas that could potentially cause problems. First two times took a total of 3hrs, I called it a night after that. I did a thorough final wipe down right before I sprayed the primer. I hit all the problematic/tight areas first, to make sure they were coated, then I came back and bombed the rest. I am by no means a professional painter, but I have a fair amount of time behind a spray gun.
Hopefully this week I can get the guide coat sanding done and then get the seams all sealed up. I really would like to get the car up to the painters this weekend. I may be leaving town for two weeks on Sunday, so it would be ideal to have it done then.
I'll get more pictures up once it has been guide coat sanded and seam sealed. I need to get my buddies trailer to get it up to the paint shop. I was going to use the shops 7ton tilt bed, but some scumbag stole the 15000lbs winch off of it last weekend. Thanks for checking it out as always. Anyways, enough talk, pictures!
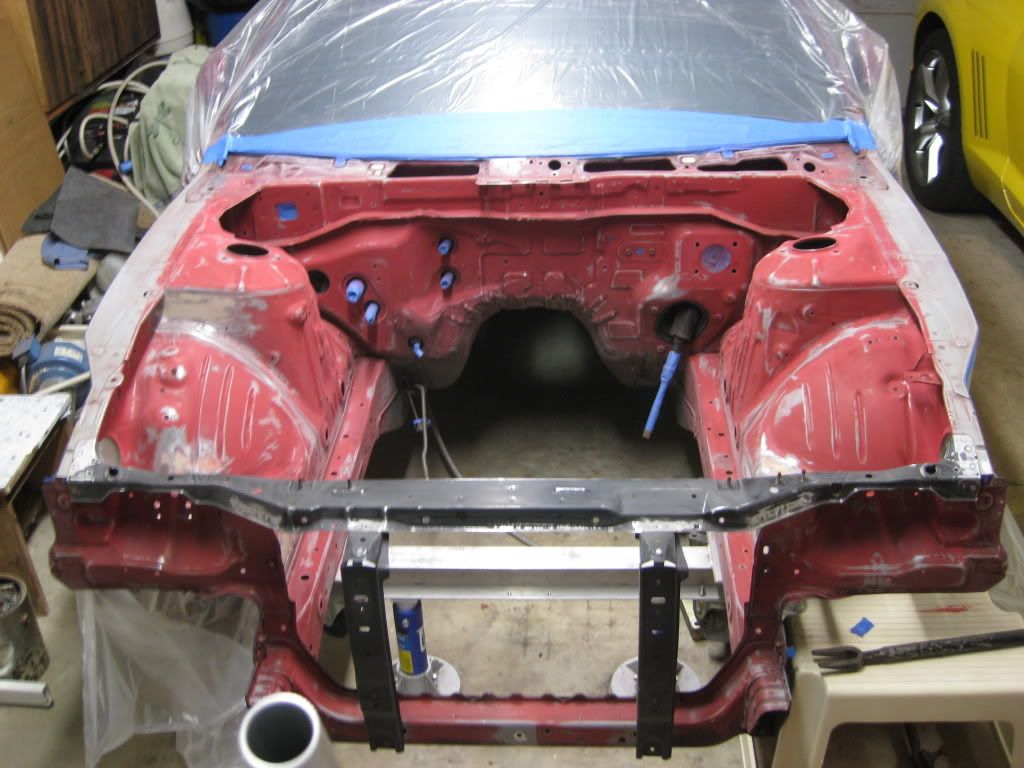

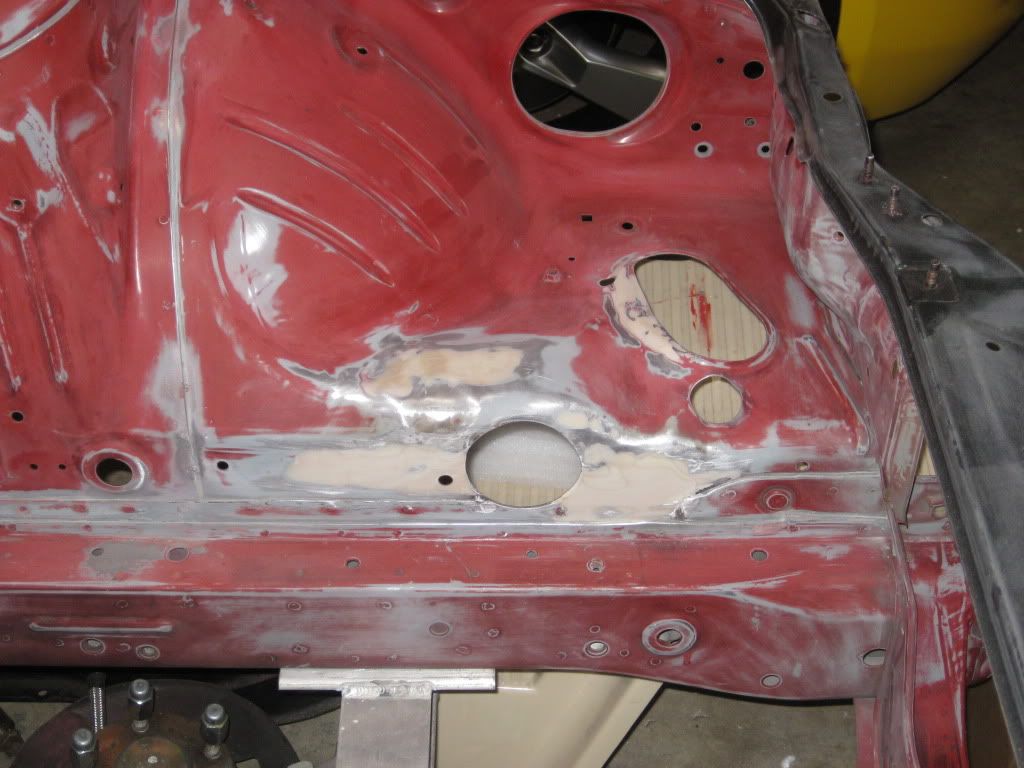

Once the sanding was all done it was time to cover/wrap the car in drop cloth...

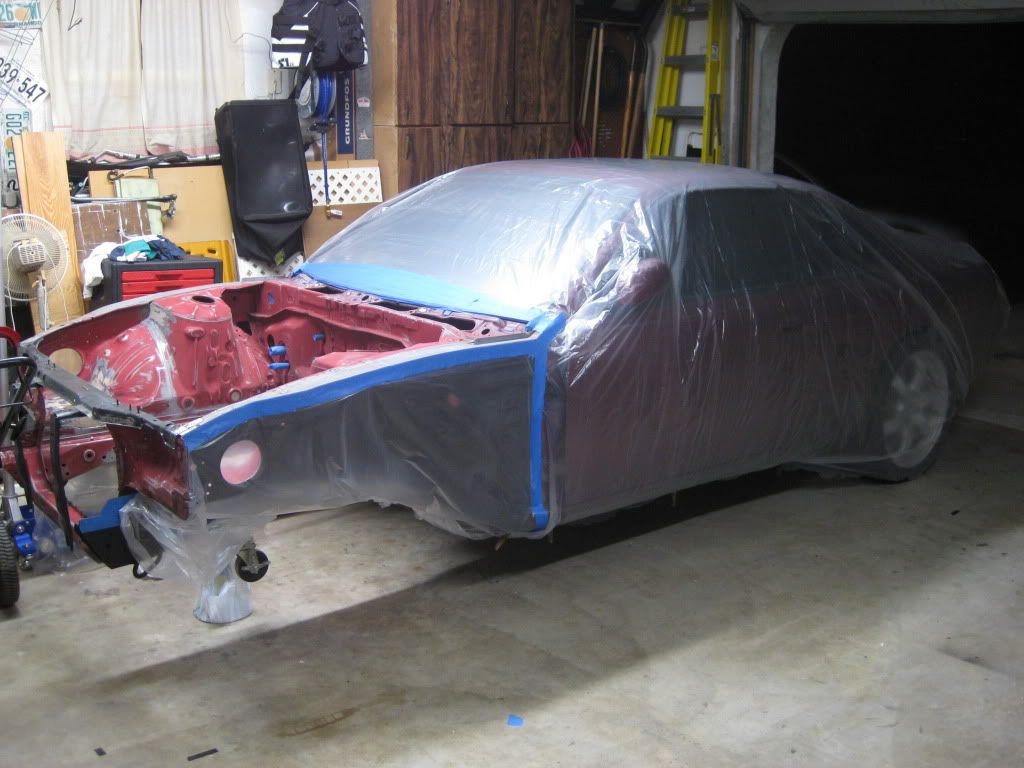
Then it was time for the wipe down/primer session...

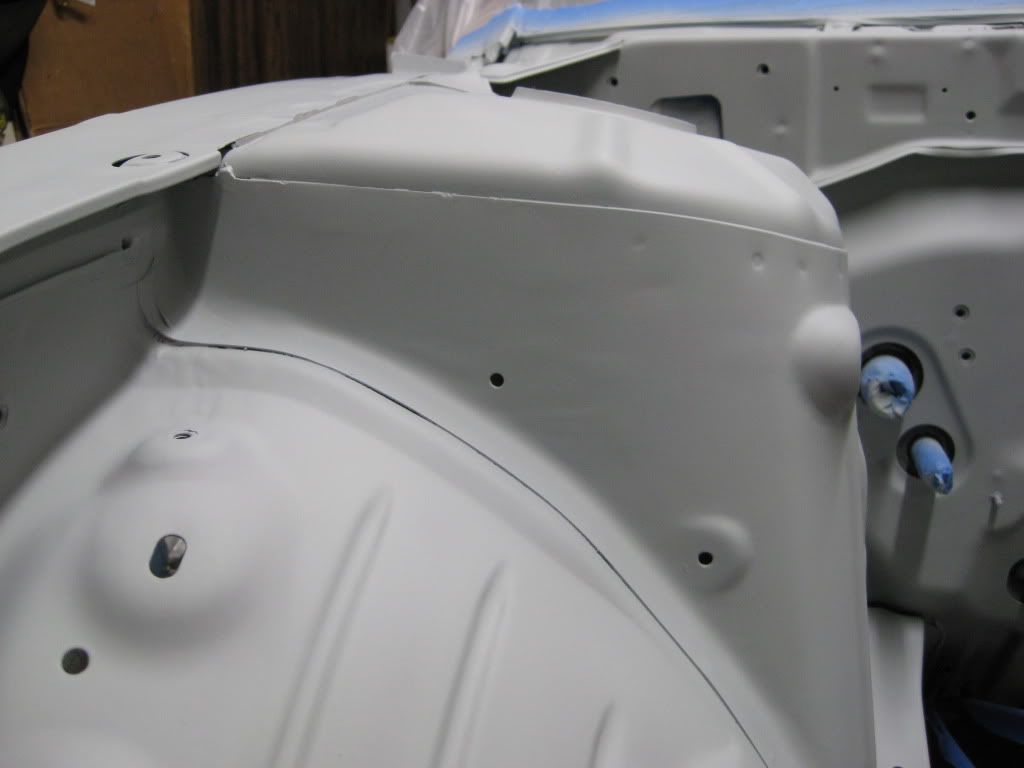
Hopefully this week I can get the guide coat sanding done and then get the seams all sealed up. I really would like to get the car up to the painters this weekend. I may be leaving town for two weeks on Sunday, so it would be ideal to have it done then.
I'll get more pictures up once it has been guide coat sanded and seam sealed. I need to get my buddies trailer to get it up to the paint shop. I was going to use the shops 7ton tilt bed, but some scumbag stole the 15000lbs winch off of it last weekend. Thanks for checking it out as always. Anyways, enough talk, pictures!


Once the sanding was all done it was time to cover/wrap the car in drop cloth...


Then it was time for the wipe down/primer session...


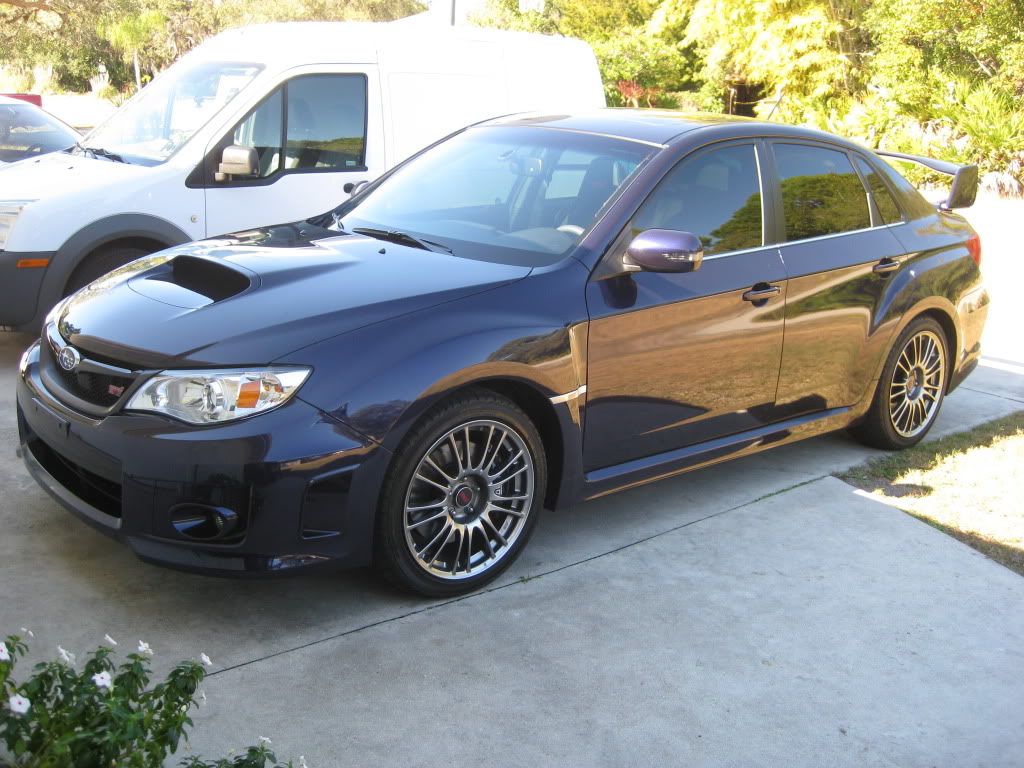
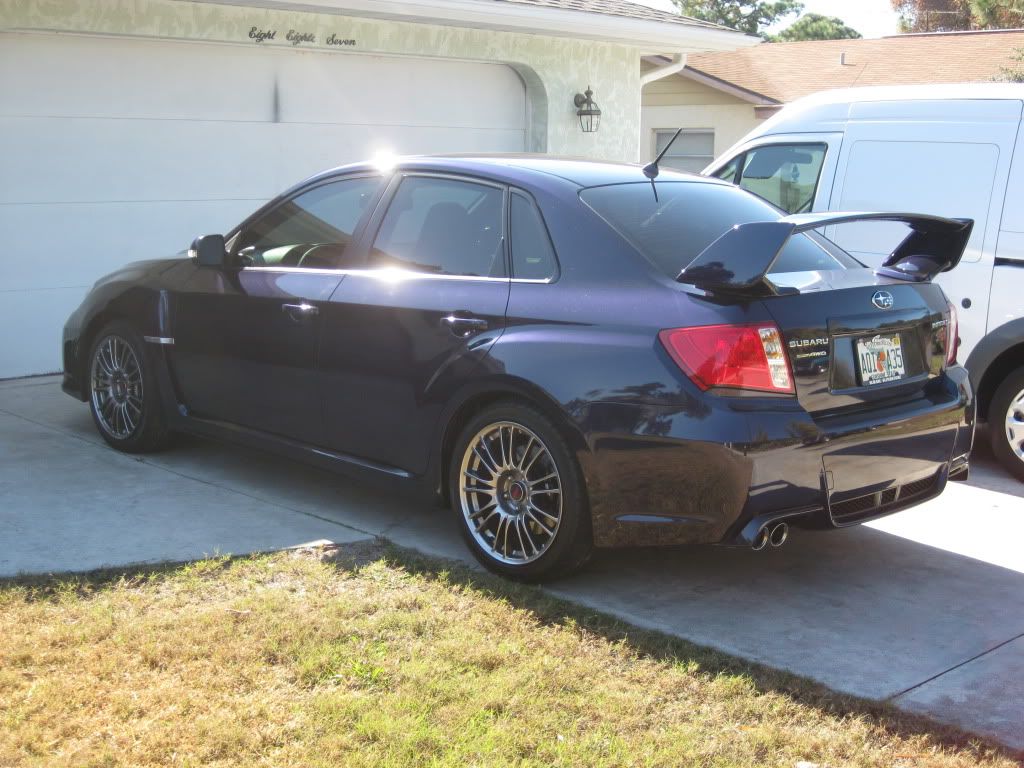
Ah, I also forgot to post pictures of my Christmas present to myself. I ordered a 12' Subaru STi LTD in Nov, and it was delivered 4 days before Christmas... The color is Plasma Blue Pearl, it color shifts from deep blue to purple and blackish in overcast/dark skies. It's an extremely sick color and shows off the body lines beautifully.


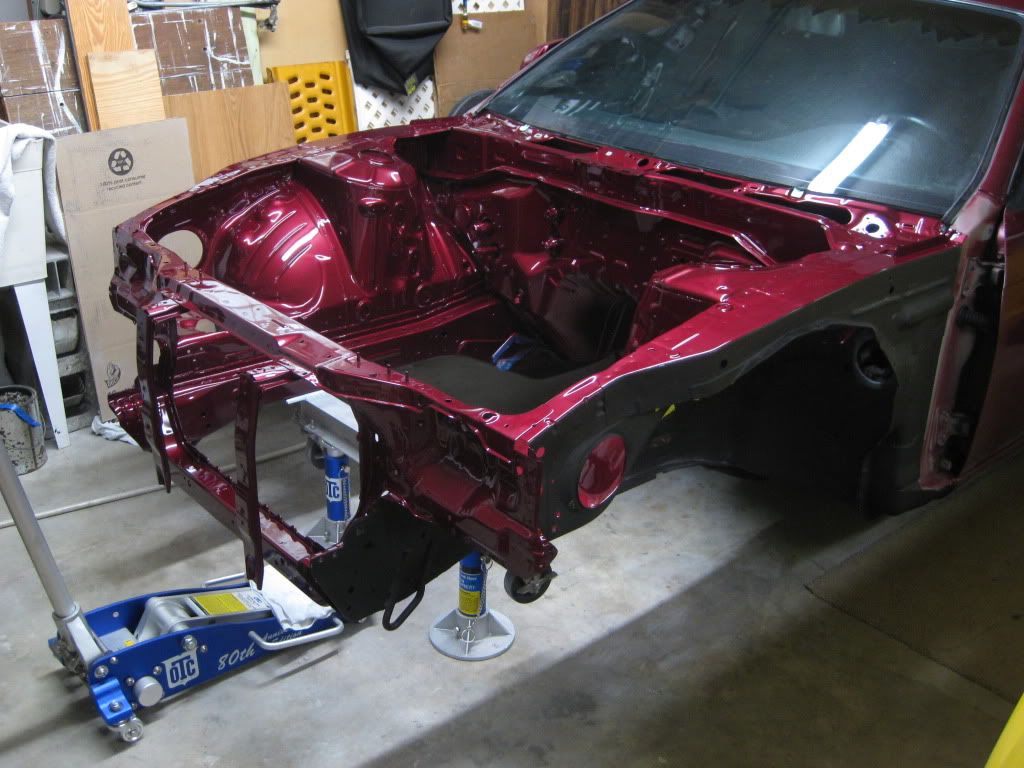
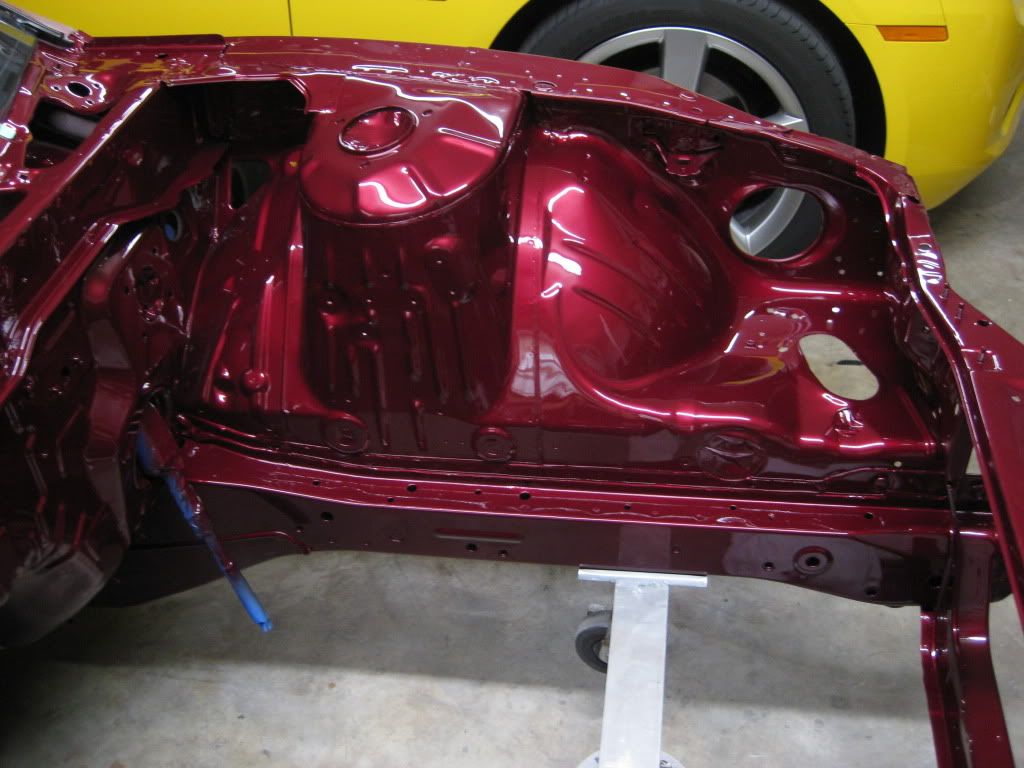
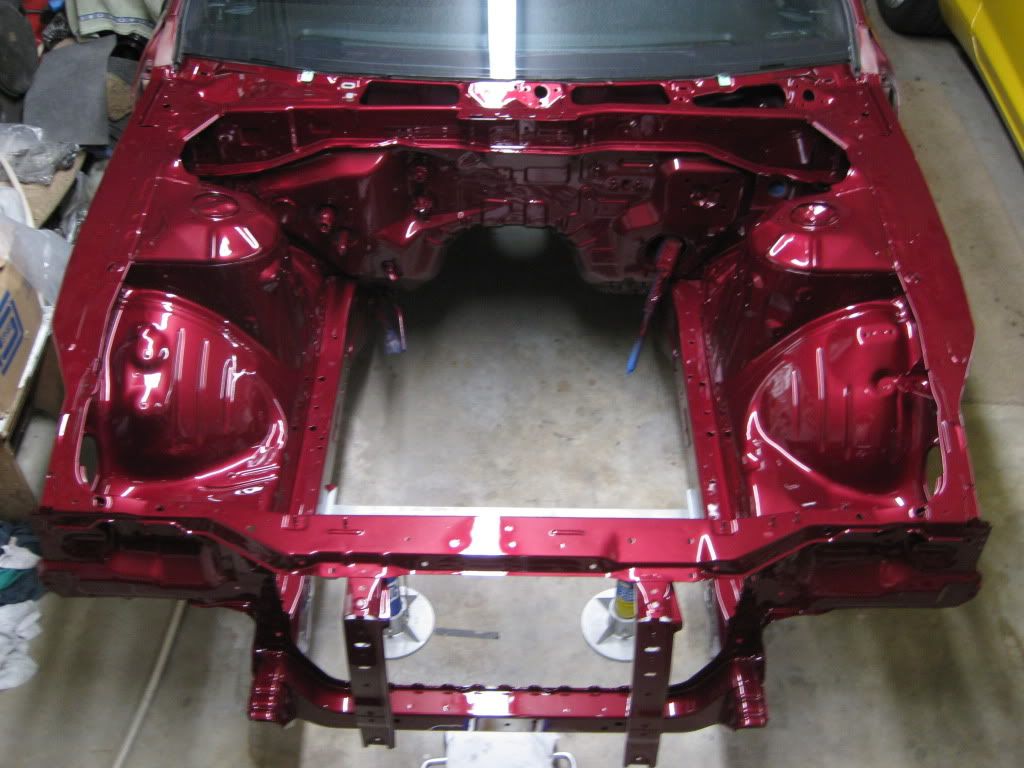
Last week I dusted my engine bay with black primer to use as my guide coat for sanding, I also seam sealed everything before final coat... Let me tell you right now that it was a pain in the ass. I used 400grit sand paper and sanded on it for 10-12hrs to smooth out the highs and give it that over all smooth look. It was definitely worth it after having paint laid on it this past weekend. There are a few spots that my painter missed which I'll be taking care of hopefully tomorrow, then I can proceed with bolting things back into the engine bay. Ruby pearl looks absolutely amazing in fresh style. I can't wait to have the rest of the car painted. Enough talk on to the pictures!
Here is a sample area just to give you an idea of what the "guide" coat does. You simply sand away the black specks until they are completely gone in that area. Once they are gone, quit sanding and move to another spot. I did large sections at a time to keep from getting "waves" in the primer.
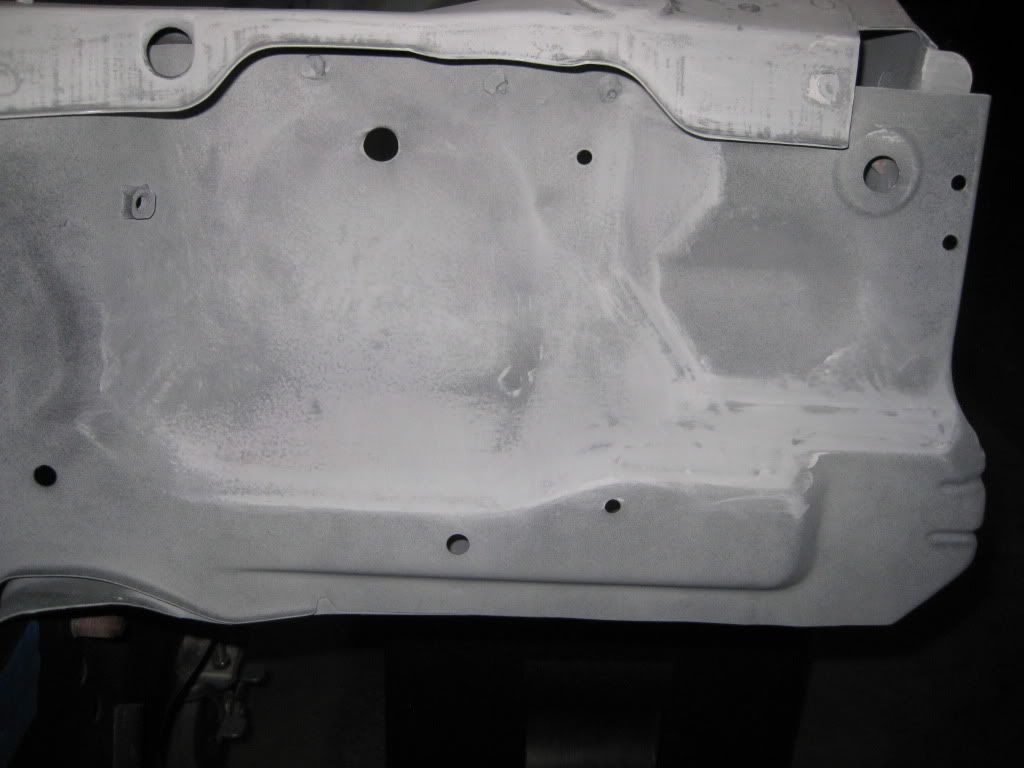
Strut top completely sanded, towers still need sanding... I continued to sand from here removing as much "dusting" as possible. Around all the contours was extremely difficult and timing consuming to do...
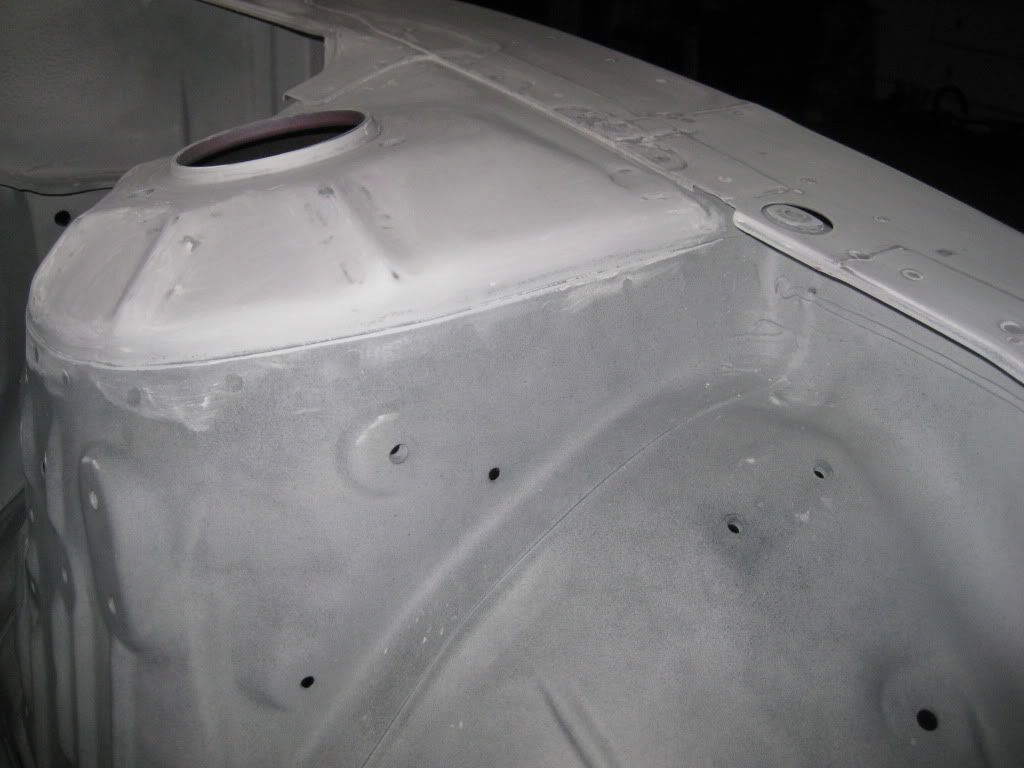
Here is where I started seam sealing. Obviously, I taped off around the seams, leaving roughly an 1/8" on either side of the seam to give me a 1/4" bead. I used the 3M heavy bodied seam sealer, this stuff sets up ridiculously fast, I'd say once you mix and start to apply, you have roughly 10mins of working time. I removed the tape within 20mins of sealing the seams. Any longer and it would have been extremely difficult to remove the tape...
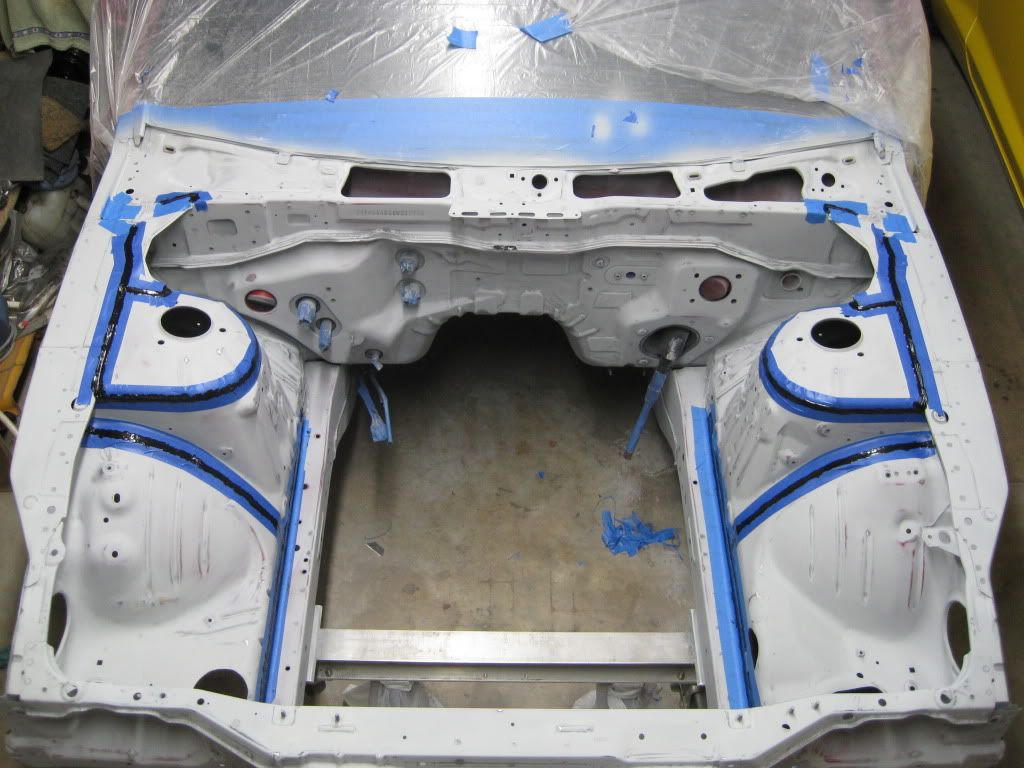

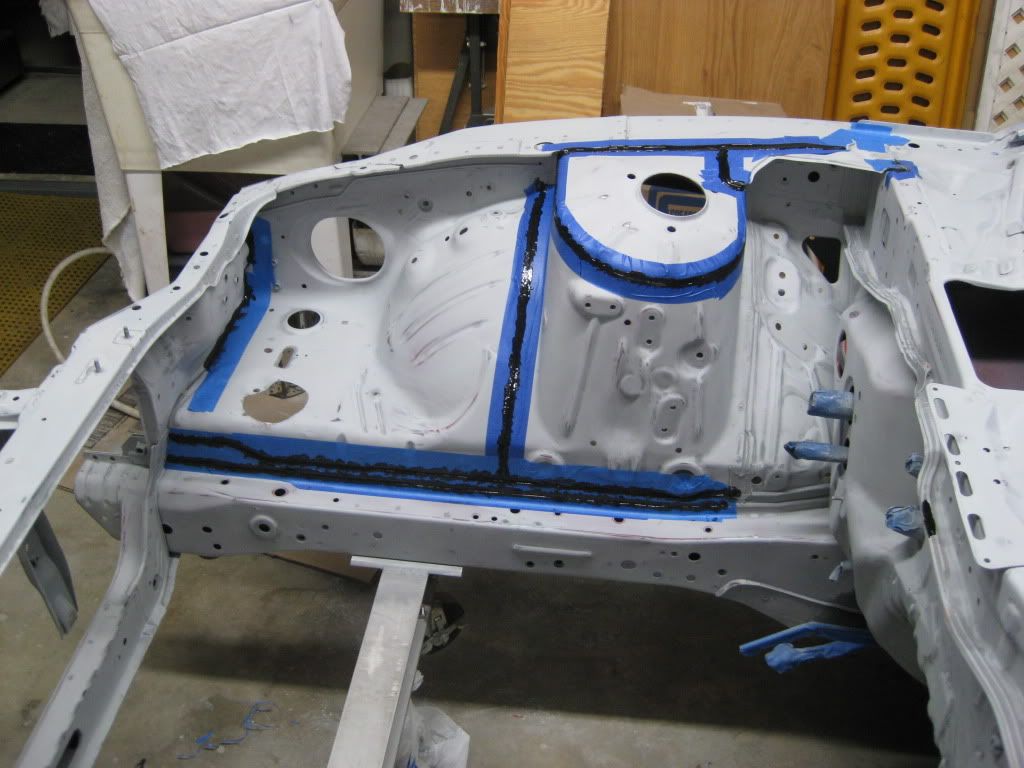
Once the tape was removed you can see how clean and organized the seams are...

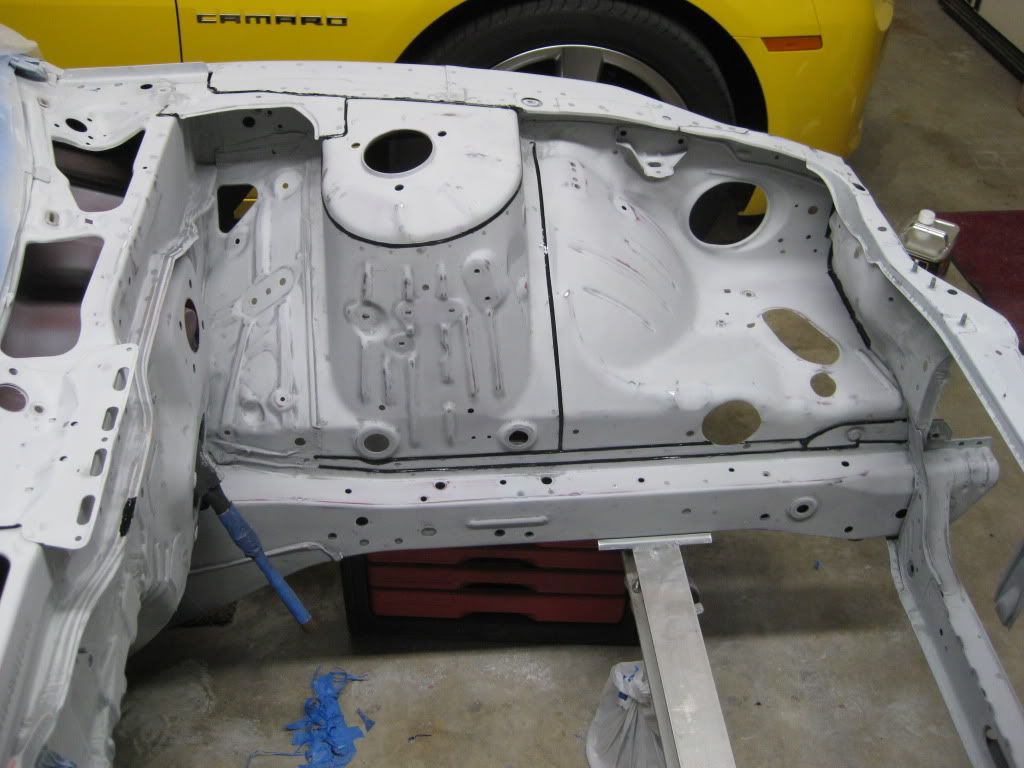
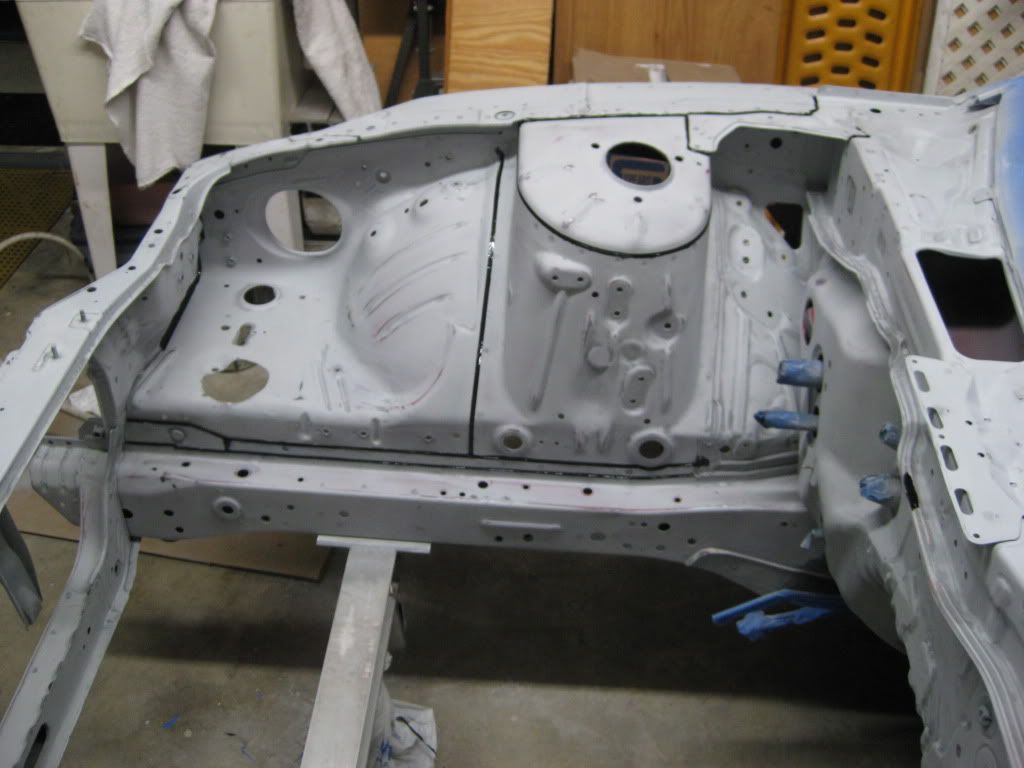
I didn't get any pictures of it on the trailer, or ever at the painters... I forgot my camera, although I may have a picture of it on the trailer on my cell. Anyway, I was up until about midnight on Friday wiping down and seam sealing the car. I had to load it on the trailer and then haul it up to my work that evening so it was sitting in a shop throughout the night. I didn't want the night air to get at the few bare metal spots and/or dew settling on it. Besides I was going to work for a few hours in the morning after I dropped the car off at 7am. Once the car was in the booth, I turned it over to the guys at Venice autobody. Jerry is an extremely nice guy and his painter is an artist. The car was finished by noon, but I wanted it to sit for a bit longer in their booth, so I picked it up at 2pm. Once it was loaded up I brought it home and got it back into the garage... On to the pictures.
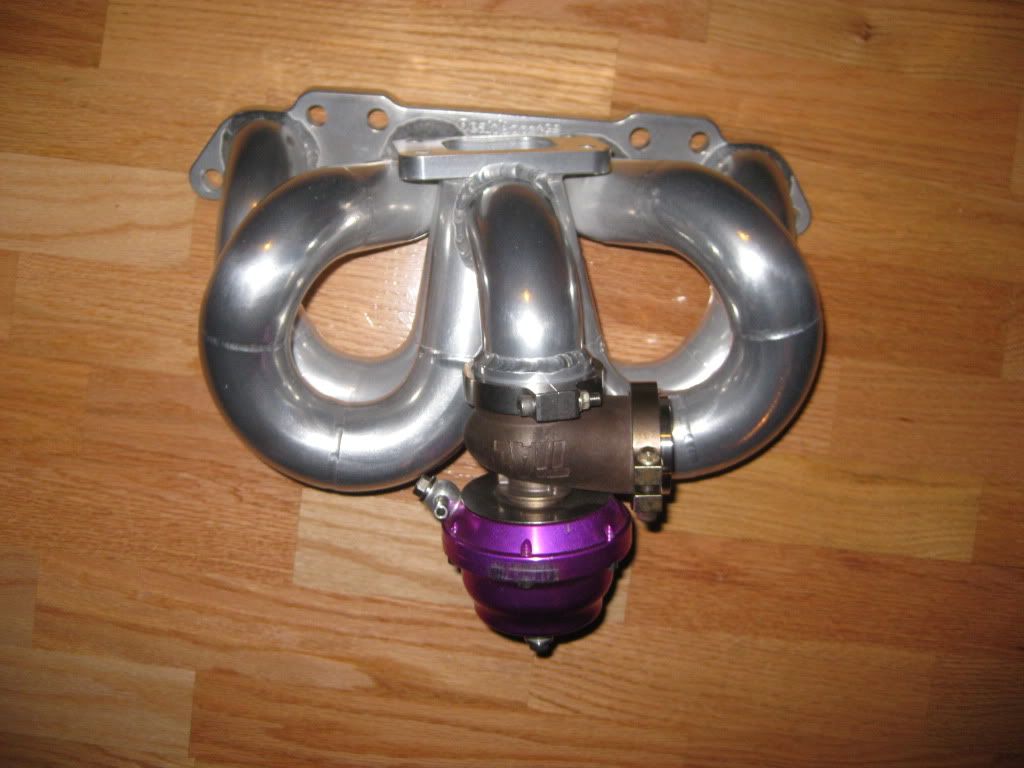
Two weeks ago I sent my manifold and exhaust housing out to ZFever, to have their coating guy coat my exhaust components. I wanted aluminum, and they only spray that particular color on Thrusdays. Well, it didn't make it on week one for whatever reason, but it was completed on week two and all I can say is WOW. It turned out amazing and honestly the pictures don't do it justice. Chris(Z350man) recommended these guys and kept me up to date with what was going on, thanks again Chris and ZFever! Once I got the manifold home this evening, I mocked up my wastegate and well, here it is...
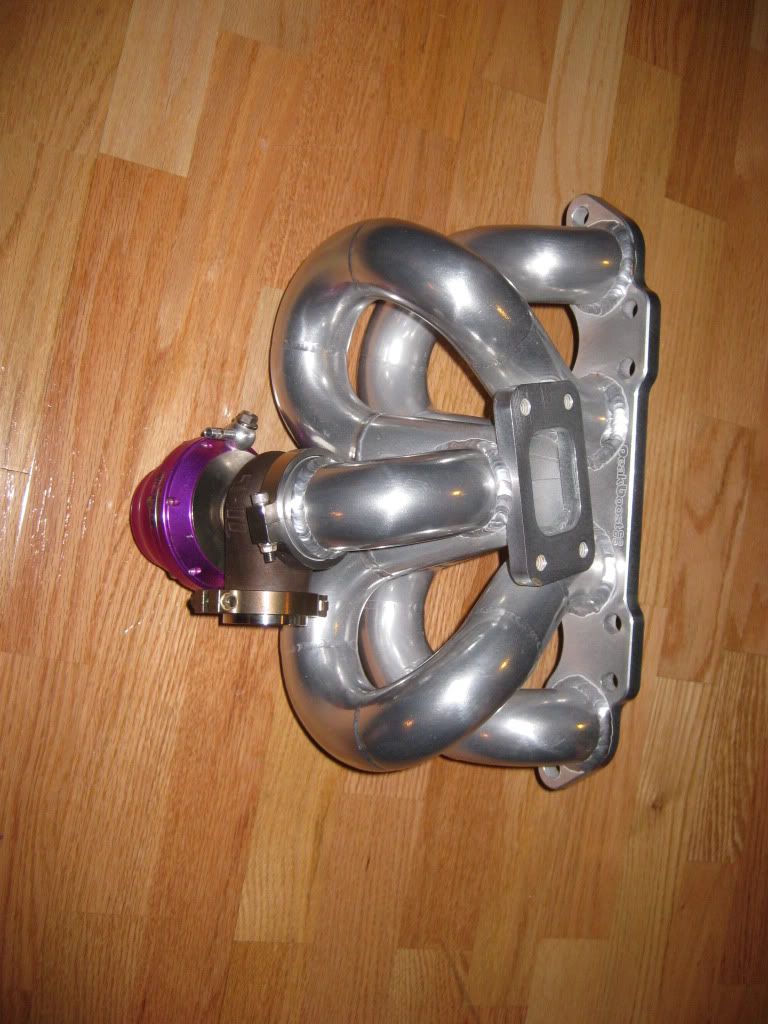
As always, thanks for looking. Stay tuned, things will be coming together more rapidly now that the bay has been painted. Thanks!
Here is a sample area just to give you an idea of what the "guide" coat does. You simply sand away the black specks until they are completely gone in that area. Once they are gone, quit sanding and move to another spot. I did large sections at a time to keep from getting "waves" in the primer.

Strut top completely sanded, towers still need sanding... I continued to sand from here removing as much "dusting" as possible. Around all the contours was extremely difficult and timing consuming to do...

Here is where I started seam sealing. Obviously, I taped off around the seams, leaving roughly an 1/8" on either side of the seam to give me a 1/4" bead. I used the 3M heavy bodied seam sealer, this stuff sets up ridiculously fast, I'd say once you mix and start to apply, you have roughly 10mins of working time. I removed the tape within 20mins of sealing the seams. Any longer and it would have been extremely difficult to remove the tape...


Once the tape was removed you can see how clean and organized the seams are...


I didn't get any pictures of it on the trailer, or ever at the painters... I forgot my camera, although I may have a picture of it on the trailer on my cell. Anyway, I was up until about midnight on Friday wiping down and seam sealing the car. I had to load it on the trailer and then haul it up to my work that evening so it was sitting in a shop throughout the night. I didn't want the night air to get at the few bare metal spots and/or dew settling on it. Besides I was going to work for a few hours in the morning after I dropped the car off at 7am. Once the car was in the booth, I turned it over to the guys at Venice autobody. Jerry is an extremely nice guy and his painter is an artist. The car was finished by noon, but I wanted it to sit for a bit longer in their booth, so I picked it up at 2pm. Once it was loaded up I brought it home and got it back into the garage... On to the pictures.


Two weeks ago I sent my manifold and exhaust housing out to ZFever, to have their coating guy coat my exhaust components. I wanted aluminum, and they only spray that particular color on Thrusdays. Well, it didn't make it on week one for whatever reason, but it was completed on week two and all I can say is WOW. It turned out amazing and honestly the pictures don't do it justice. Chris(Z350man) recommended these guys and kept me up to date with what was going on, thanks again Chris and ZFever! Once I got the manifold home this evening, I mocked up my wastegate and well, here it is...


As always, thanks for looking. Stay tuned, things will be coming together more rapidly now that the bay has been painted. Thanks!
Last edited by Jr_SS; 01-22-2012 at 06:36 PM.
looking very good man
__________________
 My shit still slow
618 whp 492 ft/lbs at 22 psi (Low Boost)on pump gas ,
stock block ,more power coming soon ,stay tuned
Tuned by Alpha @ Induction Performance
 My shit still slow
618 whp 492 ft/lbs at 22 psi (Low Boost)on pump gas ,
stock block ,more power coming soon ,stay tuned

Tuned by Alpha @ Induction Performance
Definitely an impressive project. I would love to have such a setup to bring out to Sebring, which you should consider doing your self at least once, it would be quite the monster out there. Again good meeting you yesterday, keep it up man.
__________________

RIP Tim Aldrich

RIP Tim Aldrich
Thanks gentlemen... It's definitely turning into a larger project than anticipated. Hopefully, I can make some forward progress on it in the next few months. I'm excited to get the engine/trans back in that's for sure.
Nick, like wise... I'd like to get it out there. Hell I'd like to take the STI out there too. We'll see what happens, I'll let you know if and when I head out there. We'll make a day of it and invite anyone else that would like to join.
Nick, like wise... I'd like to get it out there. Hell I'd like to take the STI out there too. We'll see what happens, I'll let you know if and when I head out there. We'll make a day of it and invite anyone else that would like to join.


